Thursday, August 30, 2007
Heirloom Tomato Tart
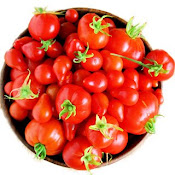
While I prefer to eat these gems raw, this recipe still allows the tomatoes to shine. Filled with caramelized onions, corn, and Gruyère cheese, and topped with a layer of heirlooms, this tart makes a wonderful summer dinner. Any leftover makes a great lunch too.
Heirloom Tomato Tart
Serves 4
1¼ C. all-purpose flour
1/3 C. cornmeal
1 tsp. sugar
1¼ tsp. salt
6 T. unsalted butter, chilled
4 T. olive oil, divided
¼ C. ice water
4 medium heirloom tomatoes
2 medium onions, thinly sliced
kosher salt and pepper to taste
kernels from one ear of corn, a scant cup
2 cloves of garlic, minced
¼ C. fresh tarragon, minced
4 oz. Swiss or Gruyère cheese, grated
basil for garnish
In a medium bowl, mix together the flour, cornmeal sugar and salt. Cut in the butter using the back of a fork or a pastry cutter, until the butter resembles the size of large peas. Mix 3 tablespoons of the olive oil with the ice water, add to the flour mixture, and stir until the dough begins to come together. Gather the dough into a ball, pat into a disk, wrap in plastic and refrigerate 30 minutes.
Preheat the oven to 400ºF. Cut the tomatoes into ¼-inch thick slices and place in a single layer on a double layer of paper towels. Sprinkle evenly with ½ teaspoon of kosher salt. Let stand 30 minutes. On a lightly floured work surface, roll dough out approximately into a 10-inch circle, then transfer to 9-inch tart pan with removable bottom. With lightly floured hands, press dough into bottom and sides of pan. Place tart pan on a cookie sheet. Line dough with foil or plastic wrap, fill with dried beans or pie weights and bake for 20 minutes or until edges are lightly golden brown. Remove pan from oven, remove beans from center, and place on cooling rack.
Meanwhile, sauté the onions in the remaining one tablespoon of oil over medium heat until slightly caramelized, about 15 minutes. Season with salt and pepper to taste. Add the corn kernels and garlic and cook for a minute longer. Add the tarragon and remove pan from heat.
Pour onion mixture into center of tart. Top with cheese. Pat the tops of the tomatoes dry with another double layer of paper towels. Arrange the tomatoes over the top of the onion mixture in overlapping circles. Bake 20 minutes longer or until cheese is bubbly and crust is golden.
Tuesday, August 28, 2007
Uwishunu Blogging
I have learned about so many great places from Uwishunu bloggers. In May I went on a little tour to check out some of their recommendations. I tasted the best falafel thanks to Tom, the best roast pork sandwich thanks to Gina and the best samosas thanks to Allison. I also have a list of about 15 other places I still need to try. Below are photos from my tour of their suggestions:
Christos' Falafel:
John's Roast Pork
Spice Market Samosas:
Sunday, August 26, 2007
Baklava
I set to work in the kitchen. I heated oil in a saucepan for the popcorn. I preheated the panini machine. I unwrapped the pizza dough and threw it in the microwave to defrost/rise instantly. (This wasn't a frozen pizza, rather an unbaked ball of dough.) I had only completed a fraction of my prep work when my friends wandered into the kitchen to inspect — they were really hungry.
Both asked why I had placed a pot on the stove. After explaining the non microwave popcorn process, I handed them the tray of baklava and guided them back into the living room. Kristin happily tucked into the nutty, honey-laden dessert, but Liz, after just a few bites, demanded her homemade pizza! I worked furiously in the kitchen to bring them more food. I rushed them the bowl of popcorn, but neither was impressed: The ratio of unpopped to popped kernels was probably 2:1. They had a valid argument.
By this point I had rolled the thawed dough into a small disk and thrown it onto the panini machine. After a few minutes, I pulled it off and slathered it with fresh ricotta cheese and fig jam. As a finishing touch, I drizzled some truffle oil — Liz's favorite ingredient — over the top. I brought the pizza into the living room, where I found Kristin on the couch settling into her food coma and Liz on the air mattress awaiting her meal.
We finished the pizza while recounting the evening, our stomachs aching from laughing, nearly crying, and very likely from eating. Kristin went to bed swearing off baklava forever, and while Liz made no mention of giving up her truffle oil, I think she identified with Kristin's state.
Fortunately, much to my relief, this bold declaration only lasted so long. Around three o'clock the following afternoon, Kristin admitted she was ready to give what remained of the baklava another go.
Baklava
1 lb. fillo dough, thawed in the refrigerator overnight
1 lb. walnuts
½ C. sugar
1 T. cinnamon
1 tsp. cloves
1 lb. clarified butter
1 lb. honey (about 2 cups)
Preheat the oven to 350ºF. Pulse walnuts in a food processor until chopped (not too finely). Remove from processor and place in a bowl with the sugar, cinnamon and cloves.
Grease a 10- by 15-inch pan with one tablespoon of the melted butter. Layer one sheet of fillo dough on top. Spoon one to two tablespoons over the dough — do not use a pastry brush. (It’s ok if much of the dough is left unbuttered.) Layer with another sheet of fillo. Spoon more butter over top aiming for areas of the dough untouched by butter in the previous layer. Repeat this layering process with half of the fillo, about 14 sheets depending on the box. Spread the nut filling evenly over the top of the fillo, then top the nuts with the remaining fillo, layering in the same manner as before.
Brush the top layer of fillo with butter. Using a sharp knife, score the baklava in a diamond pattern. Place the pan in the oven and bake for 30 to 45 minutes, or until golden. Remove from the oven and immediately pour the honey over top.
Cut and serve.
Sunday, August 19, 2007
Peach and Beet Salad
From Blossoms
Li-Young Lee
From blossoms comes
this brown paper bag of peaches
we bought from the boy
at the bend in the road where we turned toward
signs painted Peaches.
From laden boughs, from hands,
from sweet fellowship in the bins,
comes nectar at the roadside, succulent
peaches we devour, dusty skin and all,
comes the familiar dust of summer, dust we eat.
O, to take what we love inside,
to carry within us an orchard, to eat
not only the skin, but the shade,
not only the sugar, but the days, to hold
the fruit in our hands, adore it, then bite into
the round jubilance of peach.
There are days we live
as if death were nowhere
in the background; from joy
to joy to joy, from wing to wing,
from blossom to blossom to
impossible blossom, to sweet impossible blossom.
Reproduced from Rose by Li-Young Lee
Peach and Beet Salad
Serves 4
1 lbs. beets
2 T. pine nuts
2 peaches
4 oz. goat cheese
small handful of basil
Cider Vinaigrette (below)
Preheat the oven to 450ºF. Trim beets of their greens and discard. Place beets in a small shallow pan such as an 8 by 8 baking pan or 9-inch pie plate. Fill pan with water to reach an 1/8 of an inch high. Cover pan with foil and place in the oven for 45 minutes. Remove from oven and let cool completely.
Beets at the Green Market, Union Square, New York City:
Meanwhile, toast the pine nuts in a small nonstick skillet over medium-high heat until golden. Set aside.
Cut rough end (not long pointy end) off and discard. Rub the beets of their skin and discard. Slice beets in half through the long pointy end, then continue cutting into large wedges. Place on a large serving platter.
Slice the peaches in half, twist gently to release the pit. Cut peaches into wedges about the same size as the beets. Add to the platter. Crumble goat cheese over the peaches and beets and sprinkle with the pine nuts. Scatter small basil leaves over the top, tearing big leaves into smaller pieces if necessary. Sprinkle whole salad with salt and pepper to taste.
Give dressing a stir and with a large tablespoon, spoon dressing to taste over the top of the salad. Do not toss. Serve, passing more dressing if necessary.
Cider Vinaigrette
Yield = 3/4 cup
1 tsp. Dijon mustard
1½ tsp. honey
¼ tsp. kosher salt
freshly ground pepper to taste
¼ cup cider vinegar
½ cup extra virgin olive oil
Whisk mustard, honey, salt, pepper and vinegar. Drizzle in the olive oil, whisking to mix, but do not emulsify. Set aside.
Friday, August 17, 2007
Stuffed-Squash Blossoms Tempura
I first tasted stuffed blossoms when I worked at Fork. There, during the summer, the fried and stuffed zucchini blossoms replace the onion rings on their signature romaine salad with sauce gribiche. Regulars at Fork adore sauce gribiche, a dressing made with olive oil, lemon juice, capers, chopped cornichons, shallots and tons of fresh herbs — tarragon, parsley, chervil, chives and thyme.
A staple on the menu year round, this salad becomes even more popular every summer with the addition of these delectable edible flowers. I like Fork's preparation: They stuff them minimally with an herbed goat cheese and coat them in a simple tempura batter. I prefer the light coating of tempura to the frequently used flour, egg, breadcrumb coating, which also is delicious.
This year, Weaver's Way Co-op at the Sunday Headhouse Farmers' Market has been carrying the blossoms consistently at three for a dollar or 40 cents each. For a perfect summer meal, make a simple romaine salad with a modified gribiche dressing (recipe below), top with some crispy blossoms and serve with fresh bread and cheese. To quote my favorite food network star again, "Who wouldn't like that?"
Stuffed-Squash Blossoms Tempura
Serves 4 as an appetizer
1 small shallot, minced
¼ C. basil, chopped finely
¼ C. goat cheese
¼ C. fresh ricotta
kosher salt and pepper
1 egg
½ C. ice water
¾ C. flour
8 squash blossoms
canola oil for frying
In a small bowl, mix the shallots, basil, goat cheese, ricotta and salt and pepper to taste. Refrigerate until ready to use.
In a separate bowl, whisk egg, water and flour. Don’t overmix: batter should be lumpy. Set aside.
Place heaping teaspoons of the cheese mixture into the center of each squash blossom. Place blossoms on a plate, cover with a paper towel or plastic wrap and chill until ready to fry.
Line a plate with paper towels. Heat oil in a large, wide mouth. When a sprinkling of flour sizzles in the oil, the oil is ready for the blossoms. Dip the blossoms one by one into the tempura batter, then place carefully into the oil. Fry each for 30 seconds a side until crisp. Transfer to a prepared plate until all blossoms have been fried.
Serve immediately with a crisp romaine salad dressed in a simple vinaigrette: whisk 1 teaspoon Dijon mustard, 1½ teaspoon honey, ¼ teaspoon kosher salt, freshly ground pepper to taste, 3 tablespoons capers, ¼ cup chopped parsley, ¼ cup cider vinegar and ½ cup extra virgin olive oil until combined.
A patch of pattypan squash blossoms growing on Sam Consylman's farm in Lancaster:
Wednesday, August 15, 2007
Peach Ice Cream
I knew what I wanted before walking in, but like the others, sampled away, contemplating each spoonful, searching — pretending to search — for that one irresistible flavor, until I sensed my server knew what I was up to.
“I’ll have the pesche con panna, please.” I paid my $4.55 for the small, claimed a table and savored every bite of my Lancaster County peaches and cream gelato and every moment out of that oppressive heat.
This time of year I can't get enough of the local peaches, both Jersey and Lancaster, which have been particularly delicious this season. Inspired by this sweet, juicy fruit and Capogiro's creation, I've made a peach ice cream, which to be quite honest, is best eaten straight out of the machine. Enjoyed the day of, like fresh peaches and cream, this ice cream is nearly irresistible. A day later, unfortunately, it firms up considerably and requires a good 10 minutes at room temperature before scooping is even a possibility.
Peach Ice Cream
Yield = 1½ quarts
2 cups whole milk
1 cup heavy cream
¾ cup sugar
pinch of salt
½ vanilla bean
8 egg yolks
2 peaches
Combine milk, cream, sugar and salt in a small saucepan. Scrape seeds from vanilla bean into pot and drop remaining bean in as well. Heat over medium until sugar is dissolved and mixture is hot but not boiling. Place egg yolks in a large bowl. Slowly ladle hot milk into egg yolks, whisking constantly. When about three quarters of the milk has been added to the pot, return the milk-yolk mixture back to the pot and turn the heat to medium. Stir constantly with a spoon or spatula until mixture thickens and coats the back of the utensil. Remove from heat, strain into a shallow vessel such as a Tupperware, cover with plastic wrap (placing wrap directly on custard) and chill in the refrigerator until completely cold.
Meanwhile, bring a small pot of water to a boil. Make a small slit in the bottom of each peach, add to the water and boil one minute. Drain, run the peaches under cold water and gently rub off their skin. Let cool slightly, then cut into large pieces and purée in a blender until smooth. Set aside.
Transfer custard to an ice cream maker and freeze according to the manufacturer’s instructions. When custard is just about done, add peach purée and churn for 1 to 2 more minutes, until incorporated. Transfer ice cream to storage containers and freeze until ready to serve.
Sunday, August 12, 2007
Peach Bruschetta
Joseph and Karey Scarpone, a husband and wife team with children named Sophia and Valentino (hence Sovalo), left the Napa Valley to open this bistro in early 2005. With a great wine list and a menu filled with homemade pastas such as burrata-filled ravioli and seasonal items such as chilled melon soup and local heirloom tomato salad, Sovalo has earned a reputation as one of the city's best new restaurants.
A few weeks ago, I finally had the chance to experience this highly praised establishment with none other than the restaurant's two biggest fans. To celebrate Matt's new job and Meredith's start of her final year of med school, and in general, to continue celebrating their recent engagement, the three of us trekked across town to Sovalo.
As we approached the front door of this adored Northern Liberties bistro, however, Meredith expressed some anxiety. She worried that the peach bruschetta she and her family had enjoyed a week earlier might no longer be offered: Sovalo prints its menu daily, changing its dishes depending on ingredient availability. To everyone's relief, however, this peach, robiola, arugula and prosciutto topped grilled bread again starred on the menu. We all savored the delectable combination as a second course and ultimately pegged it the highlight of the evening.
Fortunately, this peach bruschetta, unlike Sovalo's homemade ravioli or ricotta fritter dessert, can easily be replicated at home. I have a weakness for Claudio's fresh ricotta and have used that in place of the robiola, but a number of cheeses — fresh mozzarella, mascarpone, goat or Brie — would work well in this tasty summer starter.
Peach and Prosciutto Bruschetta
Serves 6 as an appetizer
1 baguette
olive oil
2 peaches
6 oz. fresh ricotta*
2 oz. baby arugula or watercress
12 thin slices prosciutto di Parma
*I love the fresh ricotta from Claudio's. At Sovalo, the chef uses robiola, also very delicious.
Preheat the oven to 400ºF (or preheat a grill to high). Slice the baguette into 12 ½-inch thick slices, place on a cookie sheet, drizzle lightly with olive oil and bake until golden, about 10 minutes. (Or grill for 1-2 minutes a side). Transfer to a cooling rack. Slice each peach into about 12 wedges.
Spread each slice of bread generously with ricotta. Top each with a small handful of arugula or watercress. Top each with 2 peach wedges followed by one slice of prosciutto. Serve.
Thursday, August 9, 2007
Gluten-Free Cooking Spree
Bast, after suffering the trauma of delivering a stillborn baby followed by several miscarriages, visited 23 doctors before learning she had celiac disease. When she discovered that all of her health complications could have been prevented had she changed one aspect of her life — her diet — she quit her job (a top executive at a tech firm), started the NFCA, and resolved to devote her life to raising awareness about this debilitating digestive disease. Read Alice Bast's whole story on the NFCA's Web site.
One out of every 133 people has celiac disease — 3 million Americans — yet 97 percent of celiacs don't know they have it. Through the efforts of Bast, the NFCA and other organizations sharing the same goal, more doctors are recognizing the prevalence of the disease, and fewer people as a result are suffering. Currently the only cure for this disabling disease is to eliminating gluten, a protein found in wheat, barley and rye, from the diet.
While Bast told me a half dozen or so stories about celiacs restoring their health and reclaiming their lives after adopting a gluten-free diet, one is particularly poignant. Last August, a woman who had been trying to get pregnant for 10 years without success, read Bast's story in Good Housekeeping. The woman sensed she had celiac disease, began the diet, and within 6 months became pregnant.
Other celiacs have seen their migraine headaches, incessant stomachaches, diarrhea and nausea — stresses they have suffered their whole lives — disappear within days of beginning the gluten-free diet.
The "Gluten-Free Cooking Spree" is the name of an event the NFCA is bringing to cities across the country. This past June, 10 chefs and doctors in Philadelphia teamed up to prepare tasty gluten-free dishes in a competition judged by George Perrier of Le Bec-Fin and Christina Pirello of Christina Cooks. Read more about the event on the NFCA's Web site.
I decided to see for myself what gluten-free cooking entails. I've now introduced my pantry to a host of ingredients I never thought it would meet — brown rice flour, buckwheat flour, tapioca flour and xanthum gum. And, I have to say, the two recipes I tested were delicious. I have been slathering fresh ricotta on the focaccia for breakfast, and enjoying a brownie each night after dinner.
I am not in any way trying to prove that anyone can easily conform to this diet by simply purchasing the necessary ingredients. This diet requires celiacs to inspect all food labels thoroughly and question restaurant wait staff and chefs exhaustively, because even the tiniest trace of gluten — present in soy sauce, vinegars, lunch meats, panko (Japanese breadcrumbs) and most soups — can trigger an adverse immune response.
While I'll likely never know what life as a celiac is like, I have a better understanding after speaking with Alice Bast and reading other personal stories on the NFCA Web site. I greatly admire Bast's many noble efforts to prevent others from suffering the same tragedies she unnecessarily endured.
Gluten-Free Brownies
Adapted from Karina’s Kitchen: Recipes From a Gluten Free Goddess
www.glutenfreegoddess.blogspot.com
Yield = 16
5 oz. dark chocolate chips (gluten-free) + more for topping
½ C. butter
2 eggs
1 C. packed light brown sugar
1 tsp. vanilla extract
½ C. almonds, processed into a fine meal (or ½ C. almond flour)
¼ C. brown rice flour
½ tsp. fine sea salt
½ tsp. baking soda
Preheat the oven to 350ºF. Butter an 8-by-8-inch square baking pan.
Microwave the dark chocolate and butter in a Pyrex bowl for 45 seconds, stirring once halfway.
In a stand mixer using the whisk attachment, beat the eggs on medium-high speed until frothy. Add the brown sugar and beat until the mixture is smooth.
Add the melted chocolate mixture to the egg mixture and beat well for 1 minute. Add the vanilla and whisk until blended. The chocolate will look smooth and glossy. Remove bowl from stand and set aside.
In a large bowl, whisk together the ground almonds (or flour), rice flour, salt and baking soda. Add this dry mix to the chocolate mixture and stir until just combined. Pour batter into prepared pan. Sprinkle another 2 to 4 tablespoons of chocolate chips evenly over the batter if desired. Place in the oven and bake for 32 to 34 minutes. Test with a paring knife or a toothpick.
Cool completely on a wire rack, about 1 hour. Run a butter knife around the edges of the pan. Turn pan over quickly and slam onto a cutting board. The whole block of brownies should come right out. Leave the brownie block face down and cut into 16 squares, wiping knife in between cuts. Serve or store in an airtight container.
Gluten-Free Focaccia
Adapted from www.celiac.com
Yield = 8 sandwiches
¼ cup olive oil, plus more for greasing
1½ C. brown rice flour
½ C. buckwheat, amaranth or teff flour
2 C. tapioca flour
2/3 C. instant non-fat dry milk powder
3 tsp. xanthan gum
1 tsp. kosher salt
2 T. active dry yeast
1 T. sugar
1½ C. lukewarm water
4 egg whites at room temperature
2 sprigs rosemary, leaves removed and finely chopped
sea salt for sprinkling
Grease a parchment paper-lined or Silpat-lined sheet tray with 1 tablespoon of the olive oil. In the bowl of a stand mixer fitted with the dough hook, combine the flours, milk powder, xanthan gum, salt, yeast, and sugar. In a large bowl, combine the water and remaining 3 tablespoons of olive oil. Add olive oil-water mixture to dry ingredients, and mix on medium speed. Add the egg whites one at a time, mixing well after each addition. Beat on medium-high speed for 4 minutes.
Preheat the oven to 450ºF. Transfer dough — it will be very sticky — to the prepared sheet tray. With greased hands, gently spread dough out, dimpling the dough slightly with your fingers — dough will not fill the entire tray. Cover loosely with plastic wrap and let rise for 40 minutes.
Remove plastic wrap, gently dimple dough again with your fingers, being careful not to deflate. Lightly drizzle olive oil over top, sprinkle with the rosemary and salt to taste. Place in the oven, close the door and reduce the heat to 400ºF.
Bake for 15 minutes, rotate the pan and bake for 10 to 15 minutes longer until the focaccia is nicely golden. Remove from the oven and transfer bread from pan to a cooling rack. Let cool completely before slicing and using for sandwiches.
Sunday, August 5, 2007
Nectarine and Blackberry Crisp
Let me explain. These women have established some unwritten rules— chicken stock should always be homemade, pie dough should always be all butter (even a tablespoon of shortening can ruin a crust's texture), lamb should be from New Zealand and chickens from a kosher market — that, while sometimes I want to challenge, I ultimately fear breaking.
Another one of their rules regards crisps. Crisp toppings, according to the family arbiters, should not contain oats. Their favorite recipe contains flour, butter, sugar and slivered almonds. Perfectly sweet and crisp, this topping works well on any seasonal fruit and takes little time to prepare.
While I love this recipe and will continue to use it to make various crisps throughout the year, I have found a recipe for a topping I enjoy equally well that is just as simple to prepare and that fortunately doesn't break the rule: the recipe requires no oats. Made with a mix of cornmeal, flour, butter and sugar, this topping becomes beautifully golden in the oven and tastes sweet, buttery and crisp.
The addition of cornmeal — an uncommon crisp ingredient — adds wonderful flavor and texture, and complements any summer fruit. While I love a mix of stone fruit and berries such as nectarines and blackberries, peaches and raspberries, and apricots and blueberries — any seasonal fruit will do.
I know the authorities will approve!
Nectarine and Blackberry Crisp
Serves 8 to 10
1½ cups all-purpose flour
¾ cup cornmeal
½ cup sugar
pinch salt
1½ teaspoons baking powder
1 stick unsalted butter
1 large egg, beaten lightly
2 T. sugar
2 T. all-purpose flour
butter
3 lbs. nectarines, pitted and sliced into thick wedges
8 oz. blackberries
vanilla ice cream for serving
Combine flour, cornmeal, sugar, salt and baking powder in the bowl of a food processor. Pulse until well combined. Cut butter into bowl. Pulse until butter resembles the size of large peas. Transfer mixture to large bowl. Make a well in the center of the mixture and add the egg. Using a fork, gently work the flour into the egg until the egg is uniformly mixed throughout the dough. Note: The dough will not form a mass like a traditional dough would. Rather, it will clump together if pressed together.
Preheat the oven to 375ºF. Butter a 13 x 9 x 2-inch glass baking dish or individual ramekins or crème brulee dishes. Stir the 2 T. sugar and 2 T. flour in a large bowl. Add the nectarines and blackberries and toss to combine.
Spoon the fruit into the prepared dish or dishes. Sprinkle the topping over the fruit. Bake until the nectarines are tender and the topping is golden and crisp, about 30-40 minutes for individual servings and close to an hour for a large dish. Cool at least 10 minutes. Serve with vanilla ice cream.
Thursday, August 2, 2007
Korean Flank Steak and Chilled Soba
I go to Morimoto, however, for something else. Morimoto's cha-soba — chilled green tea soba noodles served with dashi-shoyu, a savory dipping sauce — cannot be found anywhere else in the city. Many sushi restaurants serve soba noodles, hot and cold, but few serve this green tea variety.
Cha-soba translates to tea-soba and describes the noodles, which are made with matcha (green tea powder) and buckwheat flour. Partly I enjoy the dish's assembly — seaweed-green noodles nested on ice in a bamboo box arrive next to a bowl filled with the dashi-shoyu and a plate of sesame seeds, scallions and freshly grated wasabi — but mostly I love the chewy texture and distinct green tea flavor of the noodles.
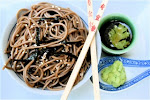
Chilled soba made with traditional buckwheat noodels:
Chef Masaharu Morimoto suggests, as communicated through his attentive servers, tasting the dashi, seasoning it with wasabi, dipping the noodles into the sauce and eating directly from the bowl. A combination of kombu (dried kelp seaweed) and bonito shavings (dried, flaked mackerel) steeped in mirin, soy sauce and water make the dashi, a flavorful and aromatic stock. Dipping the noodles, as opposed to dressing them, in a chilled broth spiked with fresh wasabi — a treat for any sushi lover — ensures a perfect ratio of sauce to noodle.
Ordered on its own, this dish, costing $12 a serving — although not the best deal for noodles in the city — makes a perfect summer lunch and when paired with sushi or grilled fish or steak, a side dish worth sharing at dinner. Cha-soba for me, like a toro-stuffed maki roll for most Morimoto patrons, induces a bliss matched by no other noodle-serving restaurant in the city.
And before I went green, I used to enjoy — adore — Morimoto's kobe beef carpaccio: thin slices of delectable, tender meat, rubbed with ginger and garlic and seared with a hot sesame-olive oil mix. Now, however, I don't know how I feel about kobe beef. Is it grass fed? I really don't know enough about the treatment of kobe beef cows, but I do know that the grass-fed beef from Livengood Farm in Lancaster is delicious. All who enjoyed the grass-fed hamburgers for the Fourth of July can attest. This marinade for flank steak (grass-fed, purchased from Livengood's at the South and Passyunk Farmers' Market this past Tuesday) can also be used for skirt or hanger steak.
Like Morimoto's carpaccio, this steak recipe has tons of ginger and garlic. The sugar in the marinade helps the meat char nicely on the grill and the soy sauce balances the sweetness. The Asian flavors in this Korean-style flank steak makes it a perfect entrée to serve with the chilled soba.
Grass-fed cows at the Livengood Family Farm in Lancaster, PA:
Korean-Style Flank Steak
Serves 4
¼ C. sugar
¼ C. + 2 T. soy sauce
1 T. + 1 tsp. mirin
6 large cloves garlic, minced
6 scallions, white part only, minced
1-inch knob fresh ginger, finely chopped
1 T. + 1 tsp. sesame oil
1½ lbs. flank steak
oil for greasing
kosher salt to taste
Whisk together the sugar, soy, mirin, garlic, scallions, ginger and sesame oil until smooth. Transfer to a resealable plastic storage container or a Ziploc bag. Place the meat and let marinate for 3 to 4 hours or overnight.
Preheat the grill to high. Remove steak from marinade and discard. If meat has marinated overnight, season it very lightly with salt or not at all . If meat has marinated for just a few hours, season lightly with salt. Grease the grill grates with oil.
For flank steak about 1-inch thick, grill four minutes on one side. Flip, grill three minutes on the other side for medium rare. Remove from heat and let rest 10 minutes before slicing across the grain.
Chilled Soba Noodles with Dashi-Shoyu
Adapted from Sally Schneider, A New Way To Cook, (Artisan, 2001)
Serves 6
½ oz. kombu (kelp seaweed)
2½ C. water
½ oz. dried bonito shavings
½ C. mirin
½ C. soy sauce or tamari
12 oz. soba noodles or green tea soba noodles
wasabi powder
1 bunch scallions, thinly sliced
sesame seeds
1 sheet nori, cut into thin strips
Place the kombu and the water in a small saucepan. Bring to a gentle simmer. After one minute, remove the kombu and discard. Remove the pan from the heat, add the bonito shavings and do not stir. When the bonito has sunk to the bottom, after a minute or two, strain the broth through a fine strainer, pressing on the bonito shavings with a spatula to extract all the liquid, then discard.
In a small saucepan, bring the mirin to a boil. Add the kombu broth and the soy sauce and simmer for 4 minutes. Remove from the heat, allow to cool, then refrigerate until chilled.
Bring a large pot of water to a boil. Add the noodles and cook until al dente, about 4 minutes. Drain and rinse under cold water or plunge into an ice bath. Drain and set aside.
When ready to serve, mix wasabi powder with water to make a paste and set aside. Place all of the garnishes — scallions, sessame seeds, nori and wasabi — in separate bowls. Divide the noodles among six plates. Pour the dashi-shoyu into 6 small bowls large enough to handle a serving of chosptick-filled noodles dipped inside, (much larger than what is pictured.) Give each diner a bowl of noodles and sauce and let them garnish their noodles as they please.